
Direct animation
vs Pose to Pose
Direct animation
‘Direct’ animation is an open-ended ‘adventure’ that starts by drawing, sculpting or photographing the first frame of the animation and then capturing each subsequent frame, progressively building up movement sequentially. This is the workflow of animation methods like Stop Motion and the Visual Music experiments. Although the process may follow some sort of storyboard and underlying narrative idea, the relationship between frames is not easy to control without a lot of practice, and not all accidents are ‘happy’.
Pose to Pose animation
‘Pose to Pose’ animation is a more more controlled and considered approach to movement devised to ensure that the animated process can be planned for ahead of making; easily revised; and split up into a division of labour in commercial studios. It is possible to anticipate where a particular action might end and how long a particular action will take- useful when working alongside sound and in planning the overall rhythm and structure of a sequence. In hand or computer drawn animation, it is possible to make continual changes to the movement itself, returning to a sequence to insert or replace frames. A very jerky leap up and down can be changed to a slow glide into the air or a sudden crash downwards can be avoided by simply adding more frames into the upward movement and taking away a few frames towards the end of the movement. Or crashes and disasters exaggerated by removing or changing position of frames.
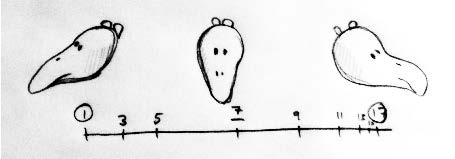
E2.7 Time Chart
To use pose to pose you draw the beginning and end of each main pose and any interesting ‘extreme’ poses between them (all known as keyframes) and then go back later to fill in the less dramatic frames in-between these keyframes (known as ‘inbetweens’). The more in-betweens you insert between an action the slower, and smoother it will become. It is not however the number of in-betweens between keyframes that matters, but their spatial and time distribution. If the in-betweens are equally spaced in time and distance then the resulting movement will be at a constant rate. If the spacing of time and/or distance is irregular then the movement will be more dynamic and lively.
A time chart is used to plan out the placement of the keyframes and in-between drawings.
TASK
Draw an animation time chart indicating key poses and placement of
in-betweens for two movements from the list below:
● A leaf falling from a tree
● Pin dropping on a hard surface
● Piece of paper being torn in half
● Coffee cup being knocked over
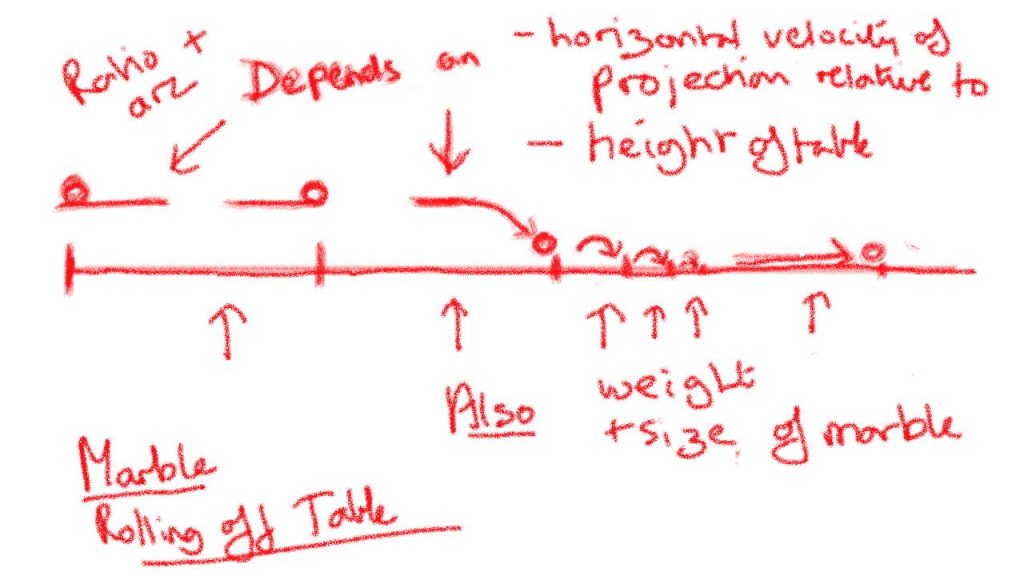
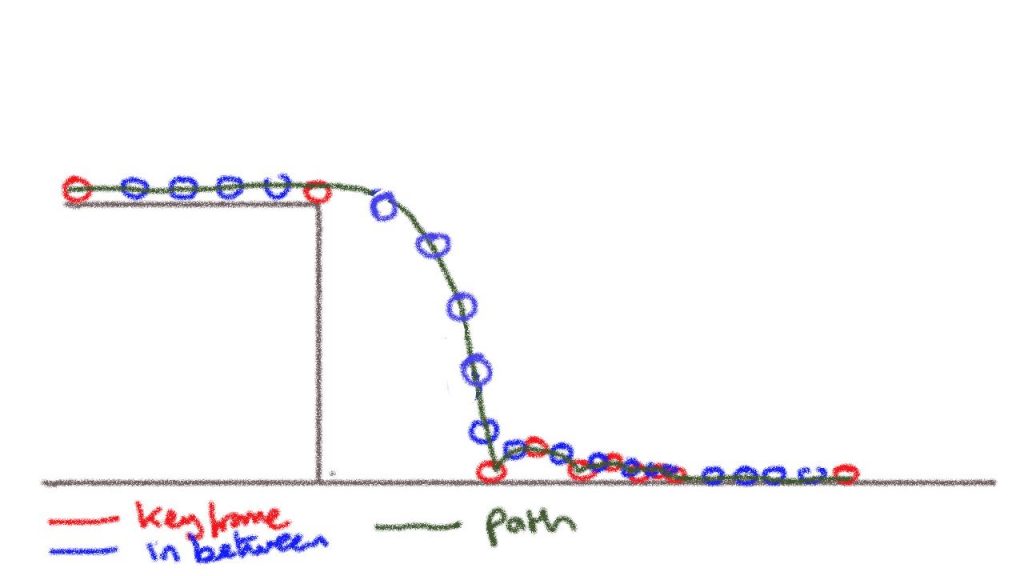
● Marble rolling off a table
● Ice melting
Upload the charts onto your learning log.
Ice Cubes
!!to do. Much more gradual. But do Inunclude all the details of the sudden cracks?
E2.8 Keyframes and
In-Betweens
TASK: Draw the key frames and in-betweens of one of your chosen movements. Scan or photograph your frames to make an animation or animated gif. You may want to add extra frames or play the movement backwards and forwards making it into a loop.
Upload the result onto your learning log as well as any amendments you made to your drawn diagram.
E2.9 Interpolation
Digital key frames and Interpolation
2D computer animation is built up from key frames. If starting point A and an end point B are set as ‘key frames’ most software (Adobe Animate, TVPaint, Adobe After Effects, Adobe Premier and Final Cut Pro but not eg Procreate or Corel Painter) will be able to work out all the in-between stages needed to move from A to B. This process of filling in the in-betweens is called interpolation or ‘tweening’.
There are two types of interpolation:
- Linear interpolation will move an object from A to B at a constant rate as if the in-betweens were plotted on the time chart at equal distances from each other.
- Bezier interpolation allows adjustment in the curve of movement so that the object will move at a variable pace: speeding up and slowing down.
Software specifically designed to 2D animation enables either direct frame by frame drawing and/or importing drawings and images that can then be combined and animated with fine control over the interpolation curves.
TASK:
Watch the tutorials on linear and Bezier interpolation on the Khan Academy website:
https://www.khanacademy.org/partner-content/pixar/animate/ball/v/a2-quick
Complete the featured exercise ‘Animation with Linear Interpolation’ using their interactive animation page.
I did not find the Khan Academy explanation particularly detailed compared to work I had done on another on-line animation course with Howard Wimshurst.
I started by doing more thorough research on You Tube about the physics of Bouncing Balls and different approaches to animating them. Adobe Animate has much more precise and user-friendly motion tween features. But TV paint also enables motion tweening and some degree of control over the speed curves. Because I was interested in marbles for this project, again I did not add squash and stretch – though some motion blur might have been good. The Red Ball animation was done as part of my Howard Wimshurst course using Frame by Frame animation in Procreate on my iPad – a softer squishier ball using squash and stretch.
See detailed post:
E2.10 Keyframing
TASK: Use digital software to animate one of the movements from the same list as in Exercise 7.
● A leaf falling from a tree
● Pin dropping on a hard surface
● Piece of paper being torn in half
● Coffee cup being knocked over
● Marble rolling off a table
● Ice melting