TASK: Develop a short finished animation drawing on what you have learned so far.
Make a short animated video using movement to express both compelling force and resistance to it.
Use the way objects move to express these two very different states. You can extend one of the project films that you have made thus far, or start an entirely new film and use any technique you like. Your animation can be abstract or figurative, silent or with sound, but it must express the two opposing processes through the animated movement alone.
It is recommended that you start this project by:
● Imagining or observing force and resistance. For example, by looking at how things drop and collide, roll and swerve, bounce and squash, teeter and fall, shoot and ricochet, etc.
● Starting to make sketches, taking photographs and making small models.
● At the same time, trying out small animated sketches, loops or GIF’s to explore movement and ideas of texture, setting and lighting.
Bring this material together and work on rough storyboards, diagrams or other description of how you will approach the shoot and your ideas for your animation.
Your short animation can be approximately a minute in length but it can be shorter than this. It doesn’t matter how short or basic your animation is. The main thing is to communicate a sense of movement and to enjoy the process of creating movement through animation.
Upload your preparatory material to your learning log along with your finished animation. Reflect on your first assignment and your learning as a whole. What do you think you have gained and what could you develop further?
Project Type: 1_Animation Basics
-
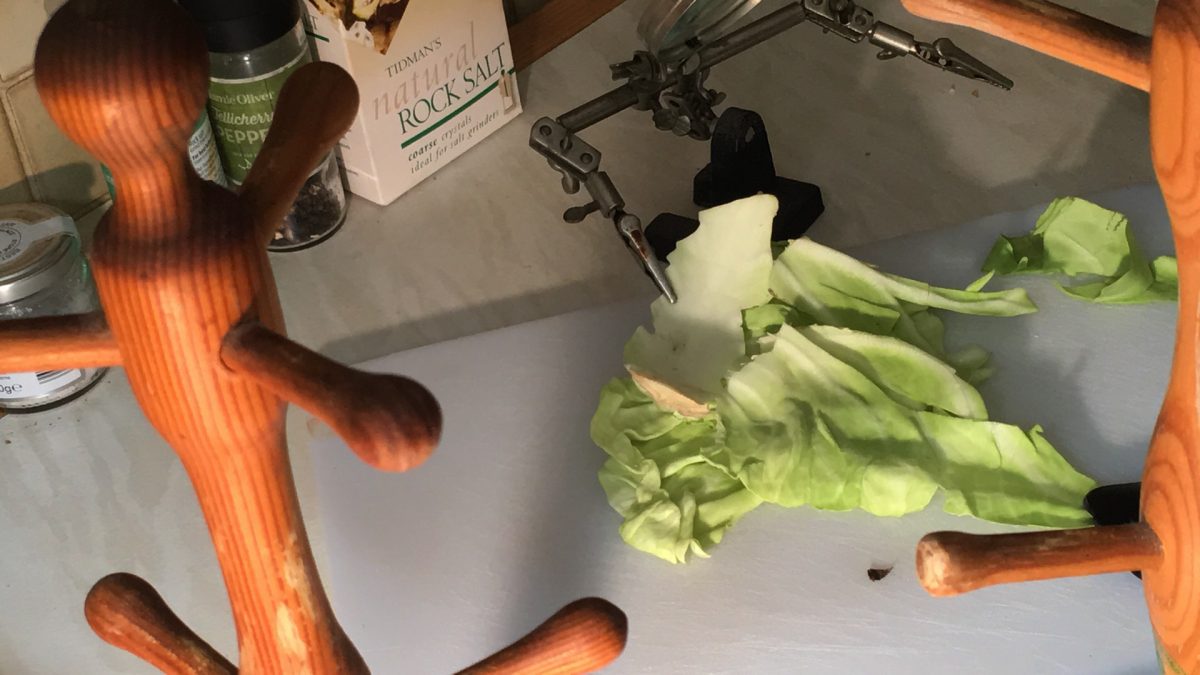
Assignment 1: Death of a Cabbage
Stop Motion Studio sequence from iPad exported from Premiere at H264 low bitrate. First edit in Adobe Premiere -
E1.6: In the Kitchen
TASK: Make an animated loop using photographs you take in your kitchen. Find objects that are of a similar shape and/or frame views that have the same dominant composition. Take inspiration from the technique employed by Toby Cornish and Jonathan Hodgson’s animations in particular. Experiment with continuity, pace, speed and disrupting this continuity. Upload the results to your learning log along with a short written text of 200-500 words explaining your rationale and approach, as well as any preliminary sketches and photographs.
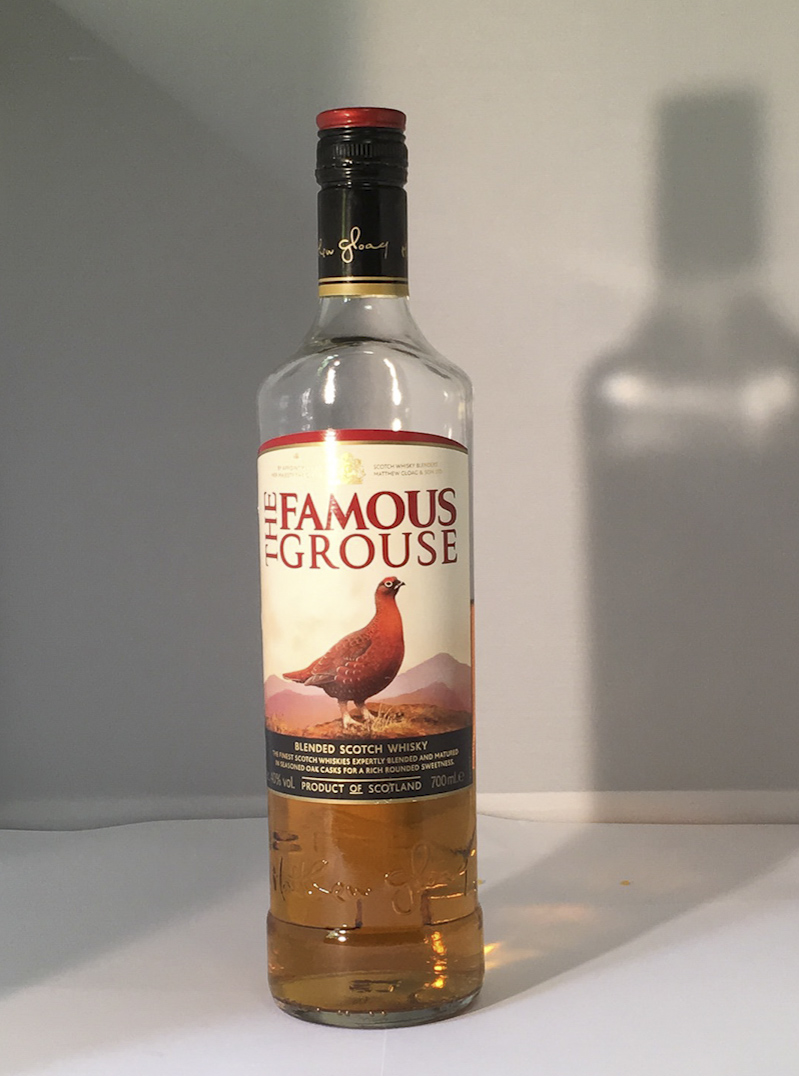
I started by assembling jars and bottles of varying size and shape from the kitchen. Then I used Stop Motion Studio on my iPad to shoot one picture of each of them. With the alcohol bottles I shot some more narrative options as well. I shot them in the kitchen using on a cloudy day using my photographic lightbox and small photographic spotlight I already have. To do anything dramatic I really need to invest in better lighting and equipment for the photography.
I experimented with sequencing, speed and reversing frames in Premiere. This was interesting – even with a few images it is possible to experiment with emotions of frenetic change and slowing down, slow dissolves of identity and punctuated obsessional movement. But I think will be more interesting if I combine with music and some sort of underlying narrative. Looking forward to doing that in Assignment 2.
Varying Speed 10-15-50-75-100-200-300-400% with reverse frames. Dissolving experiments with crossfade lengths and speeds. Obsession: punctuated disruption by whisky. -
E1.5: Animorph
TASK: Make a GIF animation of a fruit or vegetable transforming. (approximately 10-20 seconds in length)
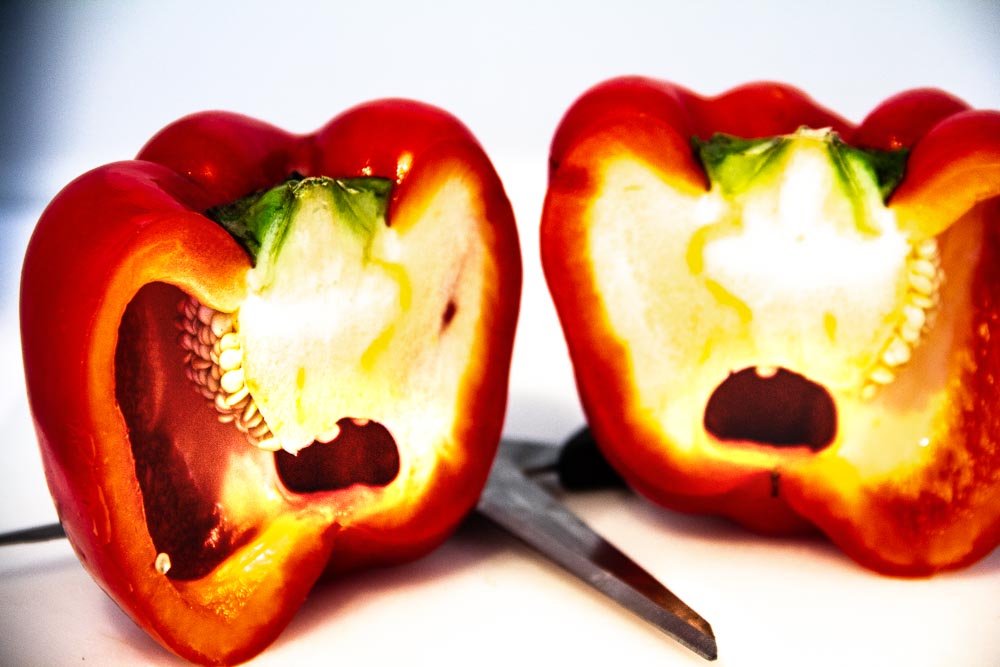
1: I Love Peppers
Step 1: Experiment and make test photographs
Step 2: Whilst taking photographs, make incremental changes to your fruit or vegetable until it has been completely transformed or even destroyed (peel, shave, slice, bite, scratch).
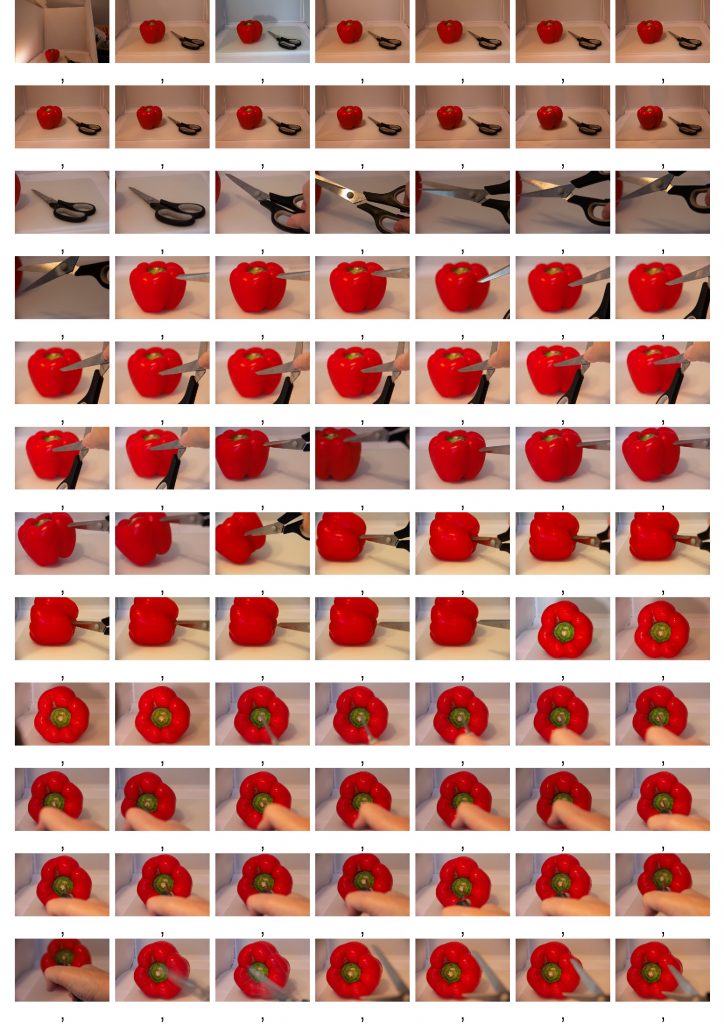
This was my fist ever StopMotion animation attempt. I was intrigued by the Jan Svankmajer animations ‘Dimensions of Dialogue’, ‘A Game with Stones’ and ‘Meat Love’ though aware that he had a whole studio of animators and experience supporting him. Normally for OCA ‘vegetable/kitchen projects’ I had chosen oriental mushrooms because of their anthropomorphic and expressive characteristics. But we had just received two beautiful red peppers in our organic veg delivery and they sat invitingly on the fridge shelf. I had always loved Edward Weston’s gnarled specimens in his black and white photographic series on Peppers: for one esample see https://www.artic.edu/artworks/120846/pepper but many more can be found on a Google search. My peppers were much more ‘dumpily feminine’ with lipstick red curves.
I started Step 1 with some very general ideas that could be adapted to my equipment and set up. I did a very quick sketch of ideas for movement from Svankmajer in my Notebook, but was not really sure whether these would be feasible for me to do on my own with my very rudimentary set up. So I decided to first jump right into Step 2 and experiment with one of the Peppers, using scissors rather than a knife and see how far I could replicate some of the Svankmajer effects.
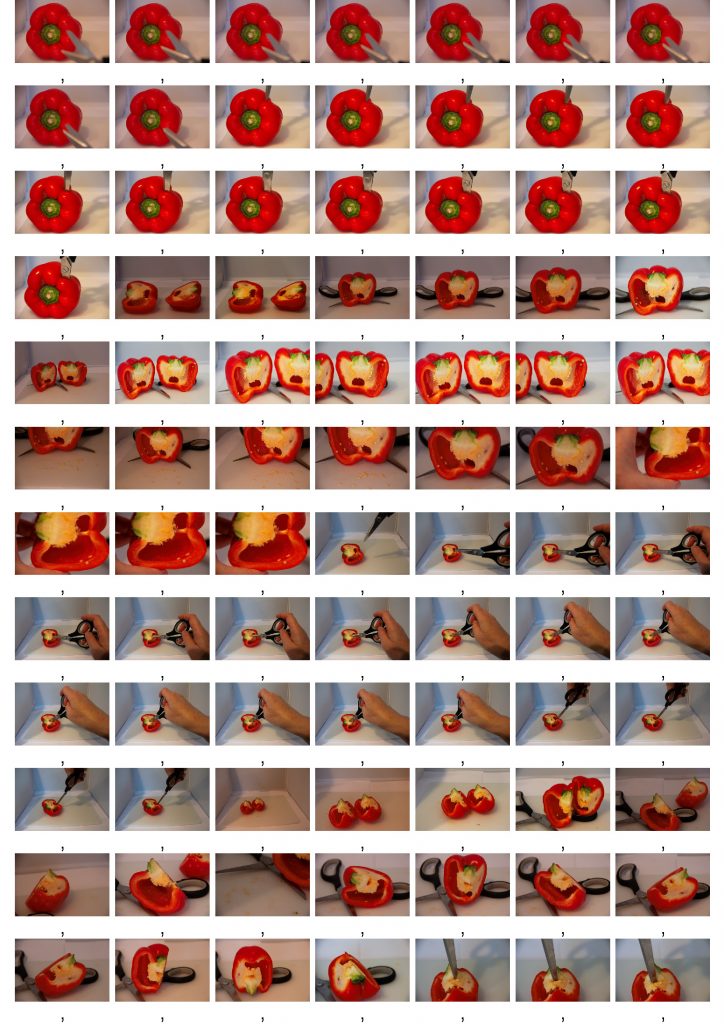
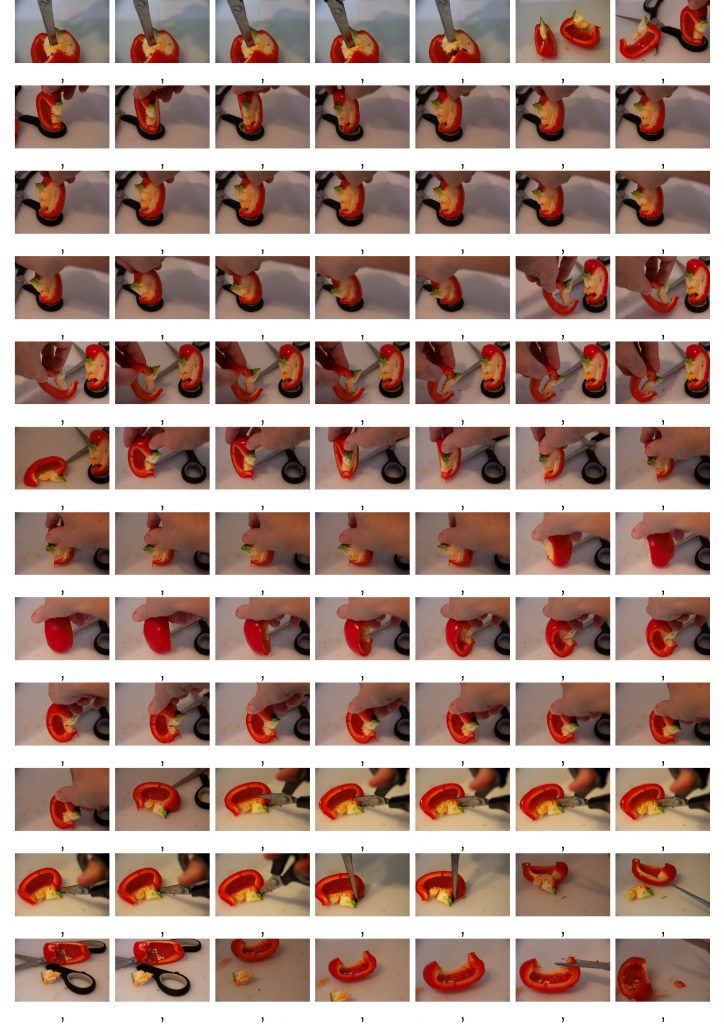
It was a cloudy day and I had a small photographic lightbox with small spotlights so I could control the lighting pretty well. I estimated that for 10-20 seconds of animation at 24FPS I would need 240-480 frames. I thought some of the images would be held for several frames or maybe animated in Premiere, and others would be very rapid. So a rough average of 2 frames per image, total 120 – 240. I systematically demolished part of my Pepper, prodding and poking and piercing as I divided into 2 halves, then as 1/2 halved to two 1/4, then one quarter was repeatedly cut up rather randomly and frenetically. I used a Zoom lens on my DSLR in Aperture mode, varying zoom, point of focus and shutter speed and a tripod. I photographed everything spontaneously as I went, trying to emphasise the different types of movement through slowing down or speeding up and maintaining consistency of position within sequences.
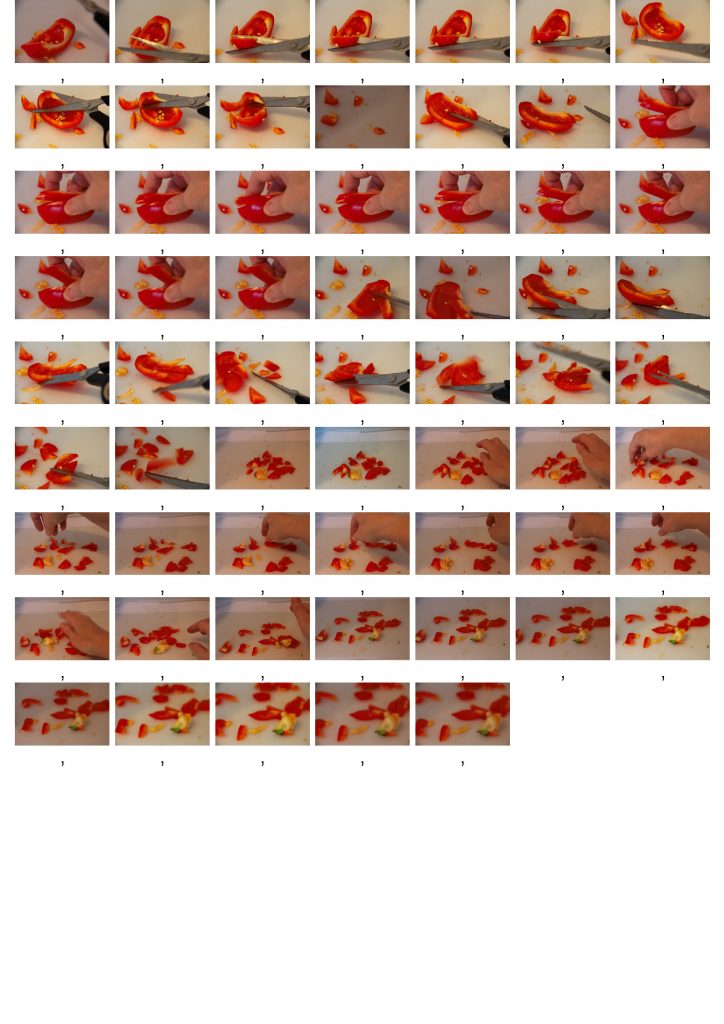
I basically just went with the flow – enjoying the prodding, poking and piercing as a release from the tensions of lockdown. I quickly realised that many of my ideas were more ‘continuous motion video’ than Stop Motion still sequence approaches. My ‘transformations’ were more ‘total destruction’ than ‘metamorphosis.’ I really needed proper equipment to hold the pepper and Stop Motion software with onion-skinning so that I could control the movements much more precisely, and get more variation in perspective etc.
But as I worked a number of ideas came tom me about the potential symbolism and themes that I might use in constructing a narrative for this animation:
- I discovered just how sensuous and sexy my Pepper’s curves were – the shiny smooth buttocks and mouth shapes on the outside and the smushy flesh on the inside when cut up.
- The seeds inside were both eggs in a cocoon and also like tears.
- I discovered all the different vulnerable, scared and screaming faces, heads and body shapes that emerged as she was cut and sliced. And the very vulnerable goosebumps of the lighter flesh inside.
- I was also rather worried about the sadistic forces that seemed to have suddenly unleashed inside me. As I pierced with the scissors slowly then fast, and squashed bits together in images of submission between my fingers.
- The lightbox was also a very clinical white enclosed setting where violence could be perpetrated. Sometimes as if behind closed doors through the peephole of my lens. Other times like a beauty pageant with all on display.
- As photographer I was also an actor conceiving and controlling events.
I reviewed and made my first selections of images in Lightroom. And as I went through the title ‘I Love Peppers’ came to me – as an ambiguous statement about love, cruelty and potential for enjoyment of pent up anger and violence. This became the theme then underpinning the editing process.
I reviewed and made my first selections of images in Lightroom and colour synchronised them to improve white colour balance and slightly increase the saturation of the reds.
Contact sheets
I reviewed and made my first selections of images in Lightroom and colour synchronised them to improve white colour balance and slightly increase the saturation of the reds.


I also experimented with different processing and masking in Lightroom to emphasise colours and textures in different ways and sharpen areas of focus.


Step 3: Upload your images onto your computer
I decided to experiment with timing and sequencing in Adobe Premiere and went through a number of on-line training courses on lynda.com and You Tube to update my skills – I had not used Premiere for about 5 years. I imported the original image white/colour-balance corrected sequence as Tiff files at 24FPs and 0.50 seconds per frame as a starting point. In Premiere I organised the images into subclips according to stages in the narrative. I then worked with each of the subclips to vary and experiment with the speed and pacing, including some animation effects on the still images to get more movement. I also experimented with some hold frames and reversed loops.
Some of the image sequences when speeded up and put in a pingpong loop are actually quite smooth like video. The end on Red Pepper II with the very slowed down images was an accident because of rendering problems. But it gave me some further ideas for a slower and much sadder ending. Red Pepper III is better but it was very difficult to work with the large image files, and to predict how the looping and different animations and frame speeds would export, even when I pre-rendered subsequences and nests.
I think these images and ideas have potential to be developed further with animatics and sound in Part 2, despite the challenges in the photography process. Using a DSLR enabled a lot of experimentation with focusing etc. But the images still need a lot of editing work. I need to go back to Lightroom, put in more sequences and rework some of the images with final narrative in mind, and export from LR as smaller files to make the rendering and preview process much easier to be able to predict how the sequences will actually export. Some of the editing might be easier if I export straight sequences from Premiere to After Effects for the more complex animation, adding transitions etc.
I also ordered a gooseneck iPad tripod so that I can experiment with iStopMotion on my iPad in the following projects.
Red Pepper 1: My first selection of still images without animation. Red Pepper II: Reselection with more images as still sequences for animation. Some of these sequences are actually quite smooth like video. The end with the very slowed down images was an accident because of rendering problems. But it gave me some further ideas for a slower and much sadder ending. Possibly I should put dissolves and do some selective motion blur in Photoshop. Red Pepper III: The animation so far. Here I did reversed loops of the cutting sequences and varied the speed and animation throughout. This could still be significantly improved. But I need to go back to Lightroom and work with much smaller image files so that the exporting process is more predictable. 2: Haircut
Potato held in place. iPad and gooseneck tripod.
Step 4 (Optional): Make a 20-30 second animation by returning to your set up with locked camera in place and repeat the process with a different fruit or vegetable. Ensure that the [detritus] last shot is in the same position in the screen as the last shot of Step 2 to enable you to create the following illusion: change the names of your images or manually reverse their order in your editing timeline so that the images play in reverse order. Add this to your initial animated sequence and export. -
E1.4: Looped Experiments
This project asked me to produce two quick looped experiments to explore disrupting registration and continuity. Then to my experiments onto my learning log and reflect on the results and consider:
- how I might ensure continuity in future
- whether there is a place for disruption as a technique?
Tip: Lighting
Flicker is the consequence of variable lighting, but it can disrupt the flow of an animation and break the illusion of movement by drawing the viewers attention elsewhere. Continuity of lighting – lighting levels, direction and colour balance – are important to ensure that when you cut between shots, visual continuity is not disrupted.
- Work in a space that has controlled lighting and is unlit by any other source of light (use blackout curtains if shooting during the day to avoid unexpected intrusions, such as car lights passing by or the shadows of leaves fluttering in lamplight).
- If you use electric lighting, ensure the energy source is constant and the bulbs are not old as this will make them likely change in colour temperature and vibrancy during the shoot.
- Avoid fluorescent lighting which flickers imperceptibly to the human eye but is registered by photography.
- If you choose to use natural light (an unusual choice, but increasingly popular), you would most likely choose either a very clear sunny day or a completely overcast day, but not a partially cloudy day.
Tip: Exposure
As with filming, to ensure continuity, you will need to set the white-balance of your camera and ensure that the exposure settings are set to manual and remain the same throughout your shoot. As animation is made up of still images, rather than recorded video, you are able to shoot in much lower light conditions than video. You are also able to use long exposure in your camera to very exciting effects.
Tip: Camera Movement
Another common problem for beginner stop-motion animators is ‘camera shake’. Just as with continuity of lighting, continuity of frame is essential in animation and is the primary mechanism on which the illusion of animation depends. As a general rule, in order for the audience to believe that something is moving within a frame there must be some elements of the frame that are kept constant. A constant rate of change such as a very slow pan of the camera would also work, however this is difficult to achieve without the appropriate software or hardware. (See more in Part 4).
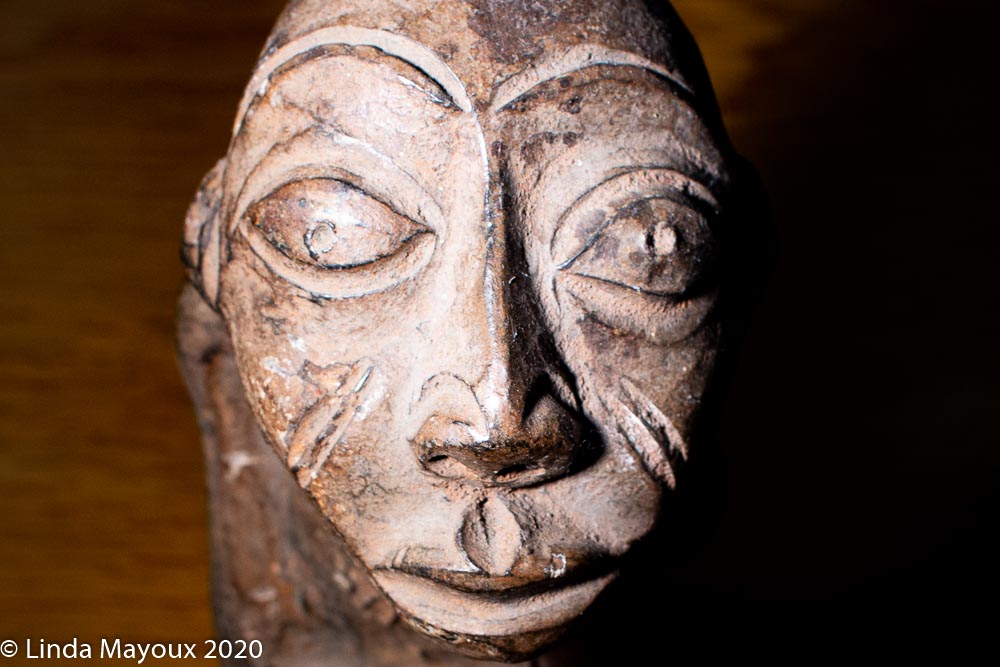
Idol no tripod. Part 1: No tripod
12 photographs of an object without using a tripod. I shot these on my iPad and collated in Procreate. These are not all of constant size and framing because of camera movement between frames. As with the chair they advance and recede. I could have corrected more for this through cropping and framing, or combining in Photoshop.
Idol tripod with lighting variations. Part 2: Tripod and changing lighting
12 frames of the same object with camera on a tripod but making changes to the lighting.
These images were shot with my DSLR camera on a tripod, some in natural light, some with the room light and some using a camera spotlight experimenting with different lighting types. These were exported from Lightroom at 1FPS. The variations in lighting are extreme, but even passing at the side of the object casts as slight shadow. The result is a slideshow rather than an animated video.
In order to prevent variations in light caused by changes even in natural lighting I would need to shoot quickly on either an overcast or sunny day where there are no clouds to change the lighting from the sun. Or in a dark room with constant artificial light. Editing software can also be used to make exposure between frames more constant – I need to experiment with that. But suspect it would not correct eg for blown highlights and shadow nose so there would likely still be differences.
But some of the dramatic lighting could be used eg
- as flashes within a more constant image series to create tension or fear, paricularly if accompanied by music.
- within a dark series of dramatic lighting a more normal shot or sequence could be inserted to show memory of reality etc.
With stop-frame animation lighting needs to be considered for each frame of the film because there is an interval of time in between the photographs you are
taking and subtle changes in lighting levels, direction and colour no matter how small will be automatically perceived by the viewer.Professional stop-frame animators wear black clothing so that their own reflections are not registered by the camera, causing the animation to flicker. It is definitely a good idea to try and stand in the same position when you take each photograph as your shadow can be one of the main disruptions of the light in the shot and cause of flicker.It is useful to get used to thinking of the entire frame and every element of it that makes up the image, not necessarily only the object that you are animating, but
the make-up of the entire rectangular frame, its brightness and colour.You would want to shoot in sequence and think of the light as a part of the films meaning and purpose, as an indication of the passing of time. We will look further into animation as a ‘process document’ in Part 2 of this unit. -
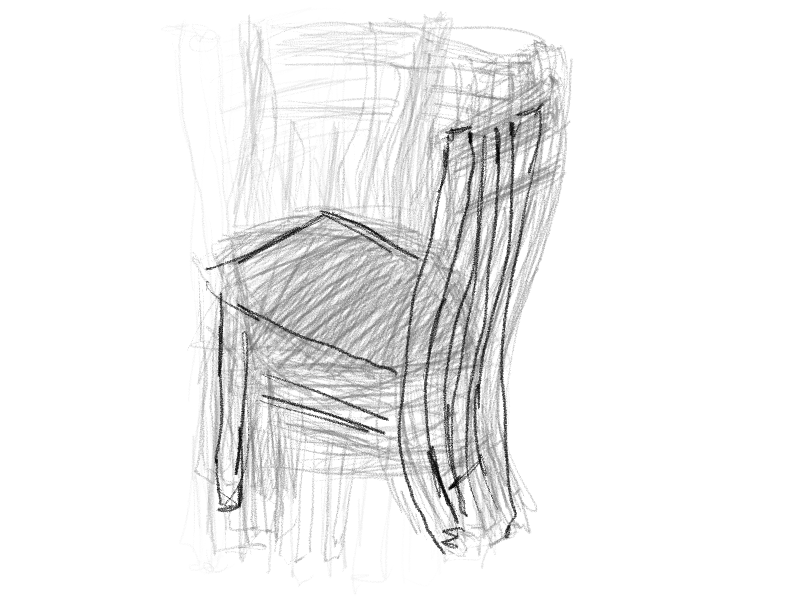
E1.3: Rotating on a Chair
For this animation I was asked to make a drawn animated loop of about 24-48 frames of a chair spinning 360 degrees. I did this on my iPad in Procreate.
- Step 1: Set up a chair in the middle of the room. This was a little bit tricky as there is no room in my house where it is possible to have a chair in the middle far enough away to move around while maintaining the same distance and viewpoint because other furniture gets in the way. I could have added an object, but the simple chair was in itself enough of an interesting challenge.
- Step 2: Make a drawing of the chair (and object). Work fast, loose and try to fill most of the page. No more than 3 minutes per drawing. Then move your seating position a few degrees to the right and make another drawing from this new perspective. Then move and draw again until you have encircled the chair and made drawings from roughly all positions around it. Number your drawings as you go along on the corner of the page.
I did very quick sketches in Procreate on my iPad, some shaded and some not. Using onion skinning to maintain some semblance of alignment and scale despite the need to draw from slightly different distances and heights to avoid furniture/stand or sit etc. I actually quite like some of the variation – it seems like the chair is sometimes coming nearer, sometimes receding and the occasional shaded frames add interest. I could experiment a lot more with this – adding more or less variation, doing all shaded shapes or all sketches and getting mor or less constancy in size through cropping/transformation and redrawing with more accurate linear perspective.
- Step 3: Import your images into your editing software. Starting with 24 frames per second, I experimented frame rates: 6FPS, 12 FPS and 15 FPS, and with loop and pingpong variants.
Chair revolving 24fps Chair revolving pingpong 12fps Chair revolving 15fps Chair revolving 6fps -

E1.2: Make an animated GIF ‘Boil’
This project asked me to make 8 drawings through tracing over a photograph either with a pencil and lightbox, or digitally. Keeping the lines fast and loose, making new images rather than keeping fidelity to the original. Then to repeat the exercise, experimenting with how tightly or loosely I do the drawing. And with the order of frames. I was then asked to create an animated gif and upload to my blog.
I chose to do this project in Procreate on my iPad to experiment with different drawing styles. I uploaded as an mp4 file because animated gifs do not play in WordPress unless enbedded. I did not want to upload thus preliminary work to vimeo or You Tube.
TASK: A Graphics Interchange Format (GIF) is a file format that supports animated and still images. It is a computer file composed of a series of images (numbering between 2 to several hundred). It is a relatively dated file format (invented in 1987) but still exists today. It allows an animation to loop endlessly and is often used in social media.
Cat Waiting pencil Cat Waiting subtle moving Cat Waiting ink line Cat waiting subtle move Cat waiting green and brown acrylic